Daring to Explore the Unknown
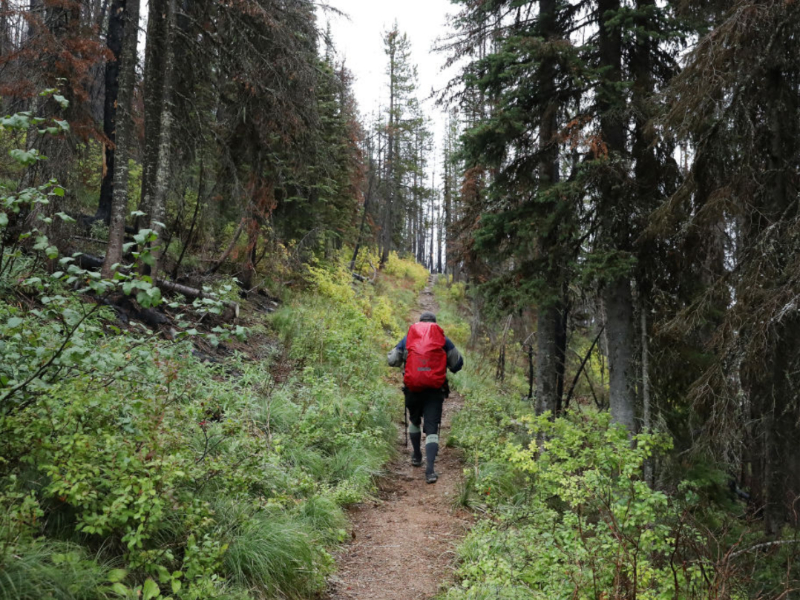
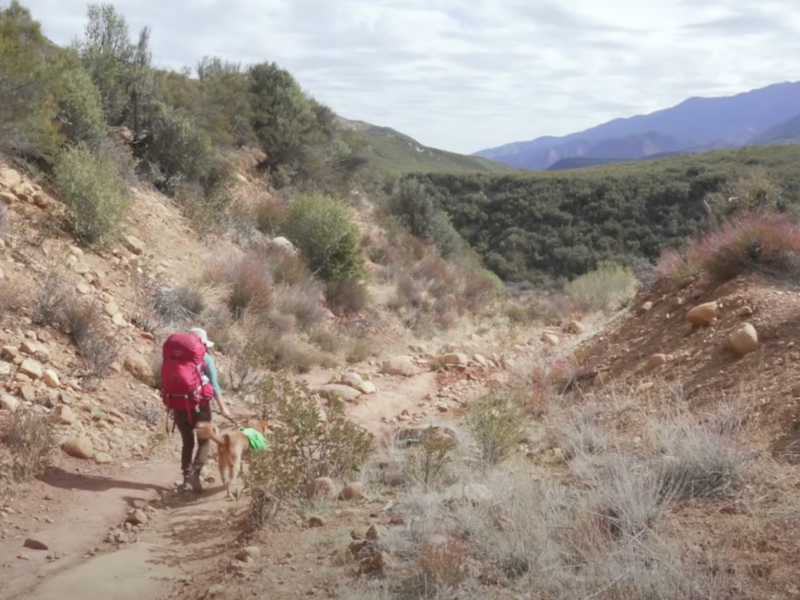
Apparently, he wanted to make the most of his free time, so the explorer set off for a big adventure in the mountains. What started as an ambitious challenge soon turned into something more than he could handle—getting lost without any supplies!
Source: Youtube / Primitive Technology
Armed with only a lighter, light jacket, half-empty bottle of water, and energy bar (plus shoes), it was clear that this daring escapade had him way out of his depth. Let’s say there were lessons learned from going on such an unprepared journey!
Planning His Next Steps
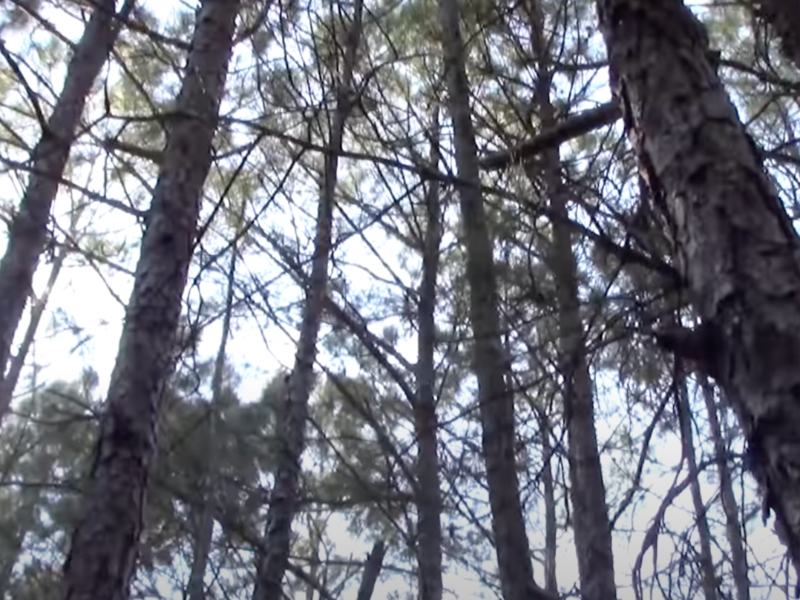
As the sun set, he became lost and realized it would be best to wait for daylight before deciding on a course of action. The man huddled against a tree and wrapped himself in his jacket, starting a small fire at his feet in an attempt to get some sleep.
Source: Getty Images / Andrew Lichtenstein
Even though he managed to doze off for a short while, he was still exhausted and scared when the sun rose. It took several hours of walking through dense brush to make real progress, and he knew he was too far from the original trail to turn back.
Some Lessons Learned in the Process
After several hours of hiking along the river, he finally came across a trail that led down to the road. Even though he was exhausted and covered in scratches from the dense bush he had to navigate, the sight of the road filled him with relief.
Source: Getty Images / Paul Marotta
The guy still had to walk about a mile up the road to reach his truck. Yet, he was overjoyed to have found his way out of the wilderness. Yet, in hindsight, he was disappointed in himself for venturing into the wilderness without proper gear or preparation.
Preparation is Always Key
However, the experience taught him a lot about himself and his ability to overcome challenges, even if they were not particularly life-threatening. From this experience, our main man learned the importance of always being prepared and trusting their instincts. As a result, he now always carries a backpack full of gear on hikes, even if they are just a few hours long.
Source: Getty Images / Chip Somodevilla
Some people may mock him for carrying a knife, two bottles, a blanket, multiple lighters, food, a first aid kit, and a compass, but he knew that one would never know what we might encounter in the woods.
Sharpening His Mountain Skills
He certainly learned this lesson the hard way and has since been dedicated to learning and studying survival techniques. As he became more comfortable with his skills, he felt more confident in pushing the boundaries of all adventures and seeing new and exciting things.
Source: Youtube / Primitive Technology
Truthfully, he no longer stresses as much about getting lost or running into unexpected situations. The guy has spent years learning how to adapt and overcome challenges in the wilderness. As a result, he can do anything he sets his mind to!
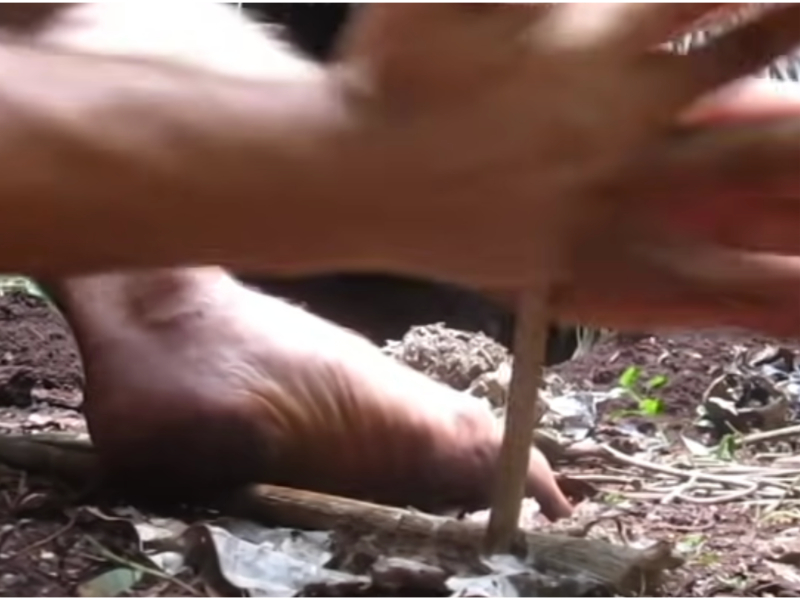
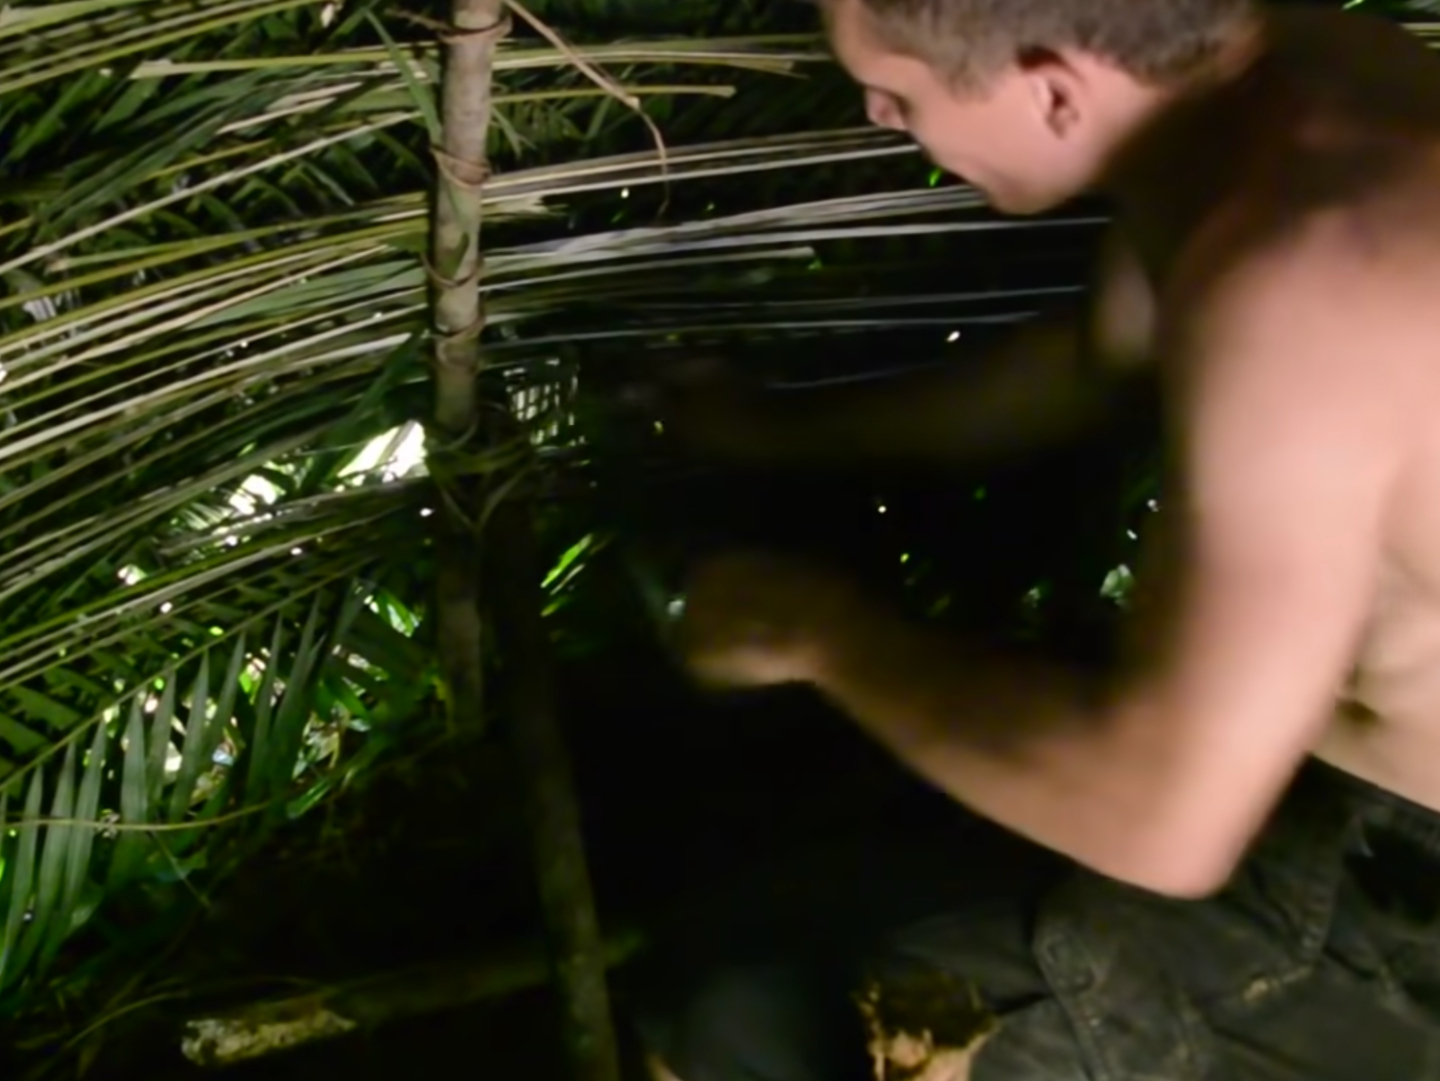
Finding a Handy Solution
He recently came across a video by Primitive Technology that demonstrates how to build one of the best outdoor survival shelters, called a Wattle and Daub structure. This type of shelter has been used by civilizations for over 6,000 years and could come in handy in the event of an extended stay in the wilderness while waiting for rescue.
Source: Youtube / Primitive Technology
Follow the step-by-step instructions in the video to learn how to make this shelter on your own. It might just be an answered prayer!
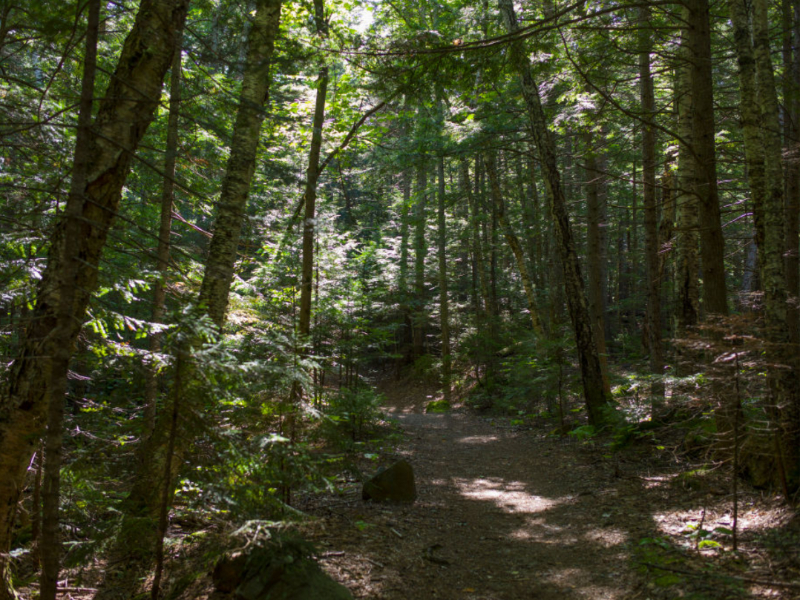
First Things First in Building
Before we begin building our shelter, we need to find a flat, level piece of ground with plenty of nearby natural resources. This type of shelter is not suitable for most desert areas because of the lack of resources, but anywhere with foliage and greenery will provide everything we need.

Source: Youtube / Primitive Technology
Clear a site that is about 10 feet by 10 feet to work in. If one does not have a knife handy, we can use a flat rock to chip off sharp pieces to cut small limbs. Choose a larger stone to take advantage of its weight and momentum, which will help conserve our energy.
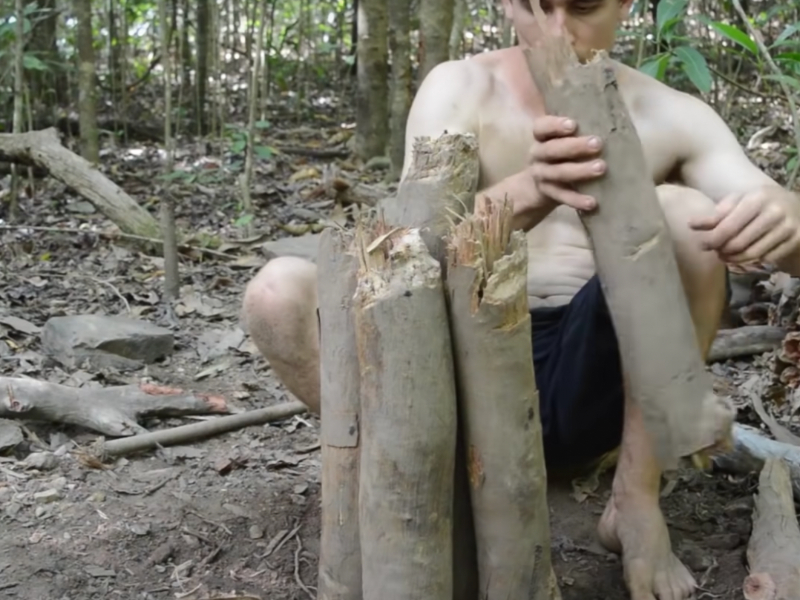
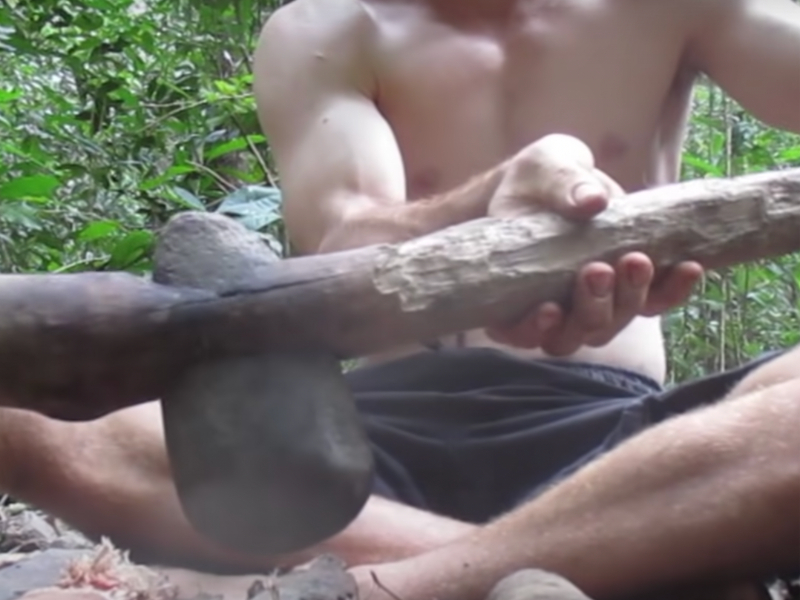
It's All in the Blade
We can use a round rock to chip away at a flat rock to create a sharp blade. With enough effort, we can craft a heavy blade that can be used to cut down the trees we’ll need for our shelter. Look for branches that are between 2 and 3 inches in diameter and utilize the sharpened stone to hack at the base of the branch to cut it down.
Source: Youtube / Primitive Technology
Remove any smaller limbs from the branch and use the stump of one of the trees to cut down as a sturdy base to cut the branches to the proper length. This will ensure we have solid and straight pieces to work with when building our shelter.
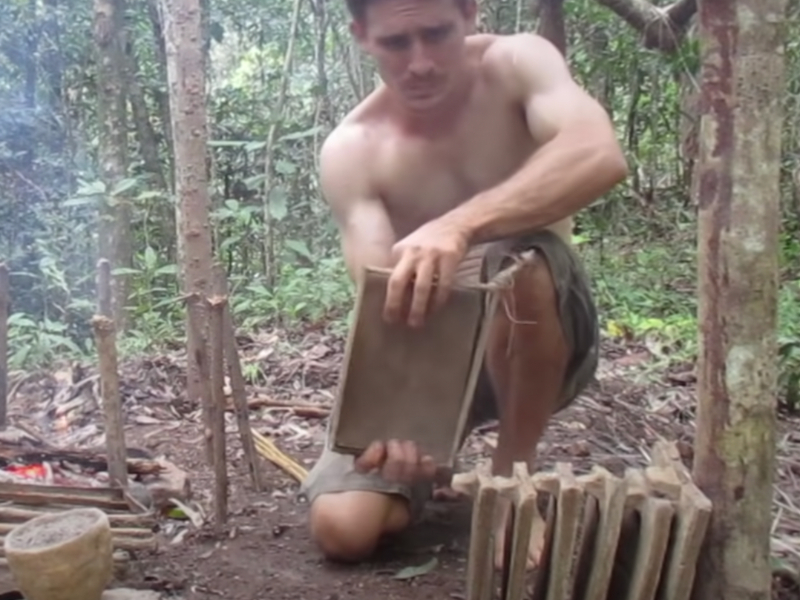
The Base Support Matters Too
To build the base columns for your shelter, use a digging stick and a large rock to pound holes into the ground. These holes will hold your main support poles in place. Look for vines in the woods to use as binding material. Almost anything thin and pliable, from small branches to roots, will work.
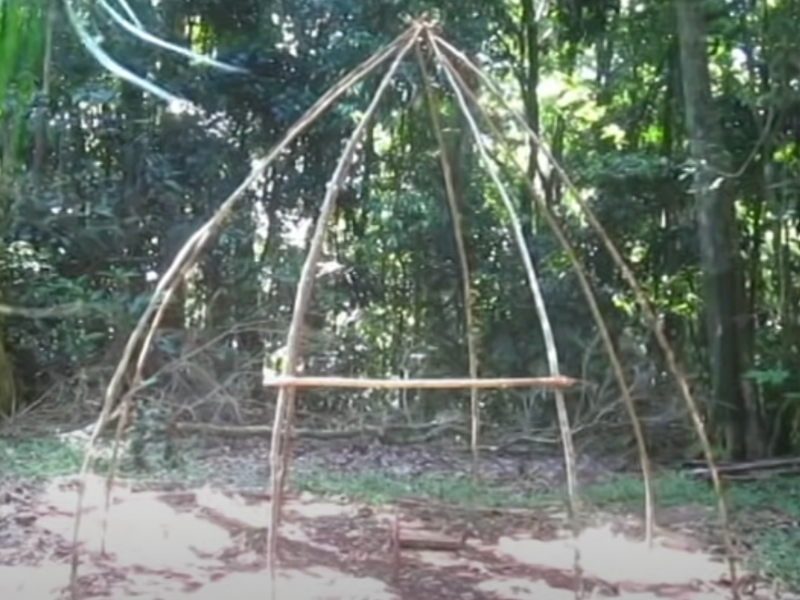
Source: Youtube / Primitive Technology
To create the main structure of the shelter, place two poles about 7 feet tall on the outside center border of your cleared area, and use the vines to lash a crossbeam between them.
Doing it All Over Again
Repeat this process on the edges of the area, using smaller branches and creating a structure about half the size of the main one. These smaller structures will hold up the roof, which can be created using smaller branches lashed together at the ends and placed on top of the main form.
Source: Youtube / Primitive Technology
Tie the roof branches together where they meet at the top, and use 4 or 5 of them to provide sufficient support. It sounds like a lot of work, but we’re sure the end result will be worth it.
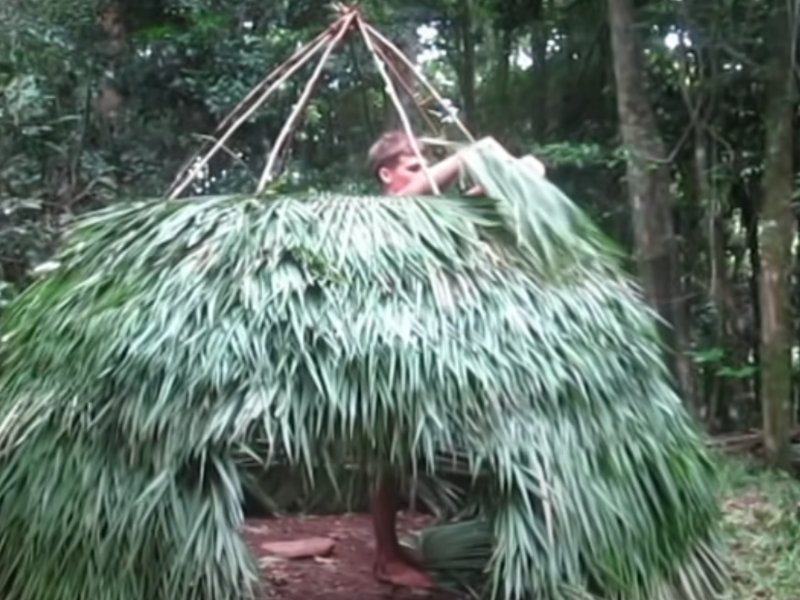
The Ins and Outs of Roofing
Here’s the easy but crucial step in creating the roofing for the shelter, gather a large quantity of leaves, making sure to choose ones that have already fallen to the ground. These are the best ones to use as they will not alter their shape when they dry.
Source: Youtube / Primitive Technology
Use long, straight twigs to hold the leaves in place by piercing the top of the leaf and spreading the twigs apart evenly. Use the binding material, such as vines or even shoelaces or strips of fabric from the clothing, to tie the roofing leaves to the main roof supports.
Learning the Ropes of Creating a Roof
Start at the bottom and work your way up to create a waterproof structure that will allow water to flow off the edges of the roof. To provide additional structural support, use the binding material to lash some crossbeams between the main supports on both open sides of the shelter, leaving one side open for an entrance.
Source: Youtube / Primitive Technology
As it is, this shelter will be suitable for survival for a few days or even a week or two. If one is still determining how long one will need to sustain oneself in the wilderness, we can take additional steps to strengthen the structure.
Make Sure to Elevate the Platform
We may make an elevated platform for resting by using the cutting stone to trim the limbs that will serve as support for the platform. Next, hammer the four posts into the ground and then strap a beam in between the two sets of posts, one set at the front and one set at the back.
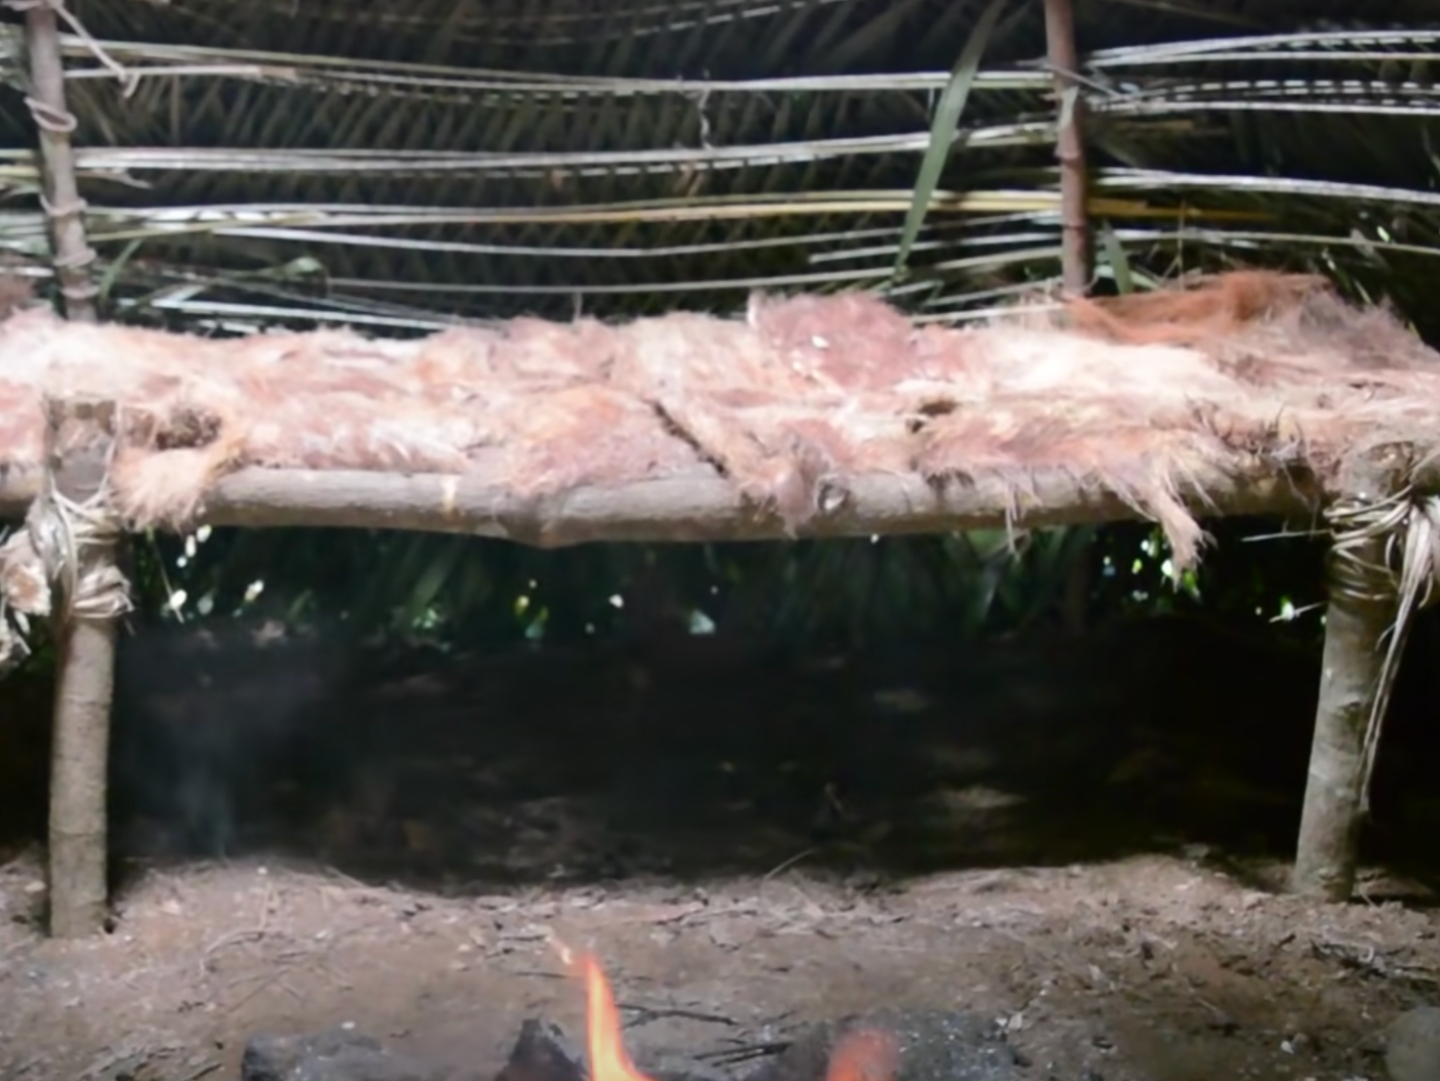
Source: Youtube / Primitive Technology
The finished product will be an elevated platform, which can then be accessed by placing long and flexible sticks in the space between the top and bottom posts.
Safety Will Always Be A Priority
Now that it’s all done, the following step will guarantee that we are protected from harm and able to maintain a level of comfort despite the severity of the storm. So, here’s the drill: make two separate cuts down each of the smaller branches with the cutting stone.

Source: Youtube / Primitive Technology
Be extremely cautious not to cut your hands since this would almost certainly result in infection, which is one of the worst things that might happen to anyone while we are trying to survive the great outdoors.
Weaving Them All Together
When the branches are sawn in two, they gain a great deal of flexibility. We should start at the bottom and work our way up, alternating the method that we weave them in and out of the wall supports as we go.
Source: Youtube / Primitive Technology
This will result in a highly sturdy construction that will shield one from the weather and other hazards that are present outside. The primary weave that will keep the daub in place will look something like this.
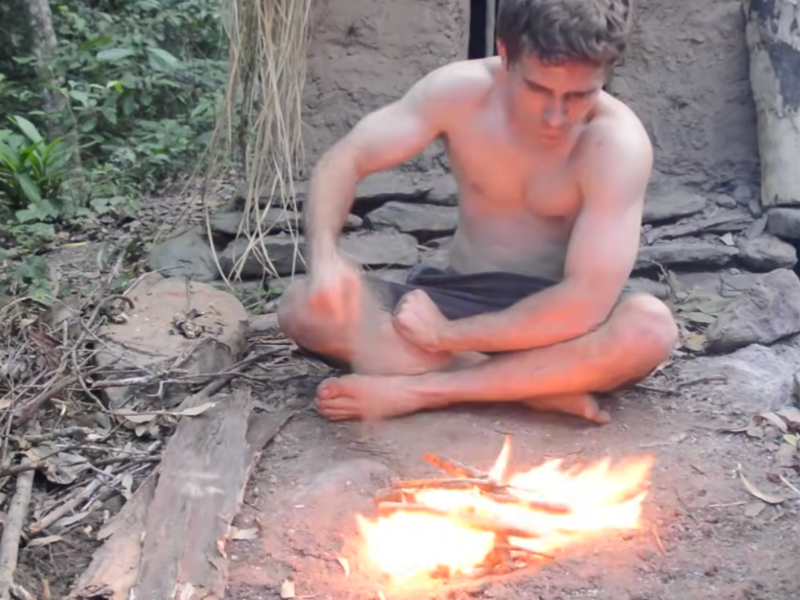
Fire Can Make or Break Us
If one has never tried it before, building a fire by hand may be a really challenging experience, even though it always seems to be presented as an easy task on television shows about surviving in the wilderness. Before, some folks felt comfortable doing it in the wild, they had to practice it quite a few times in their own yard first, and even now, they struggle to get it to work most of the time.
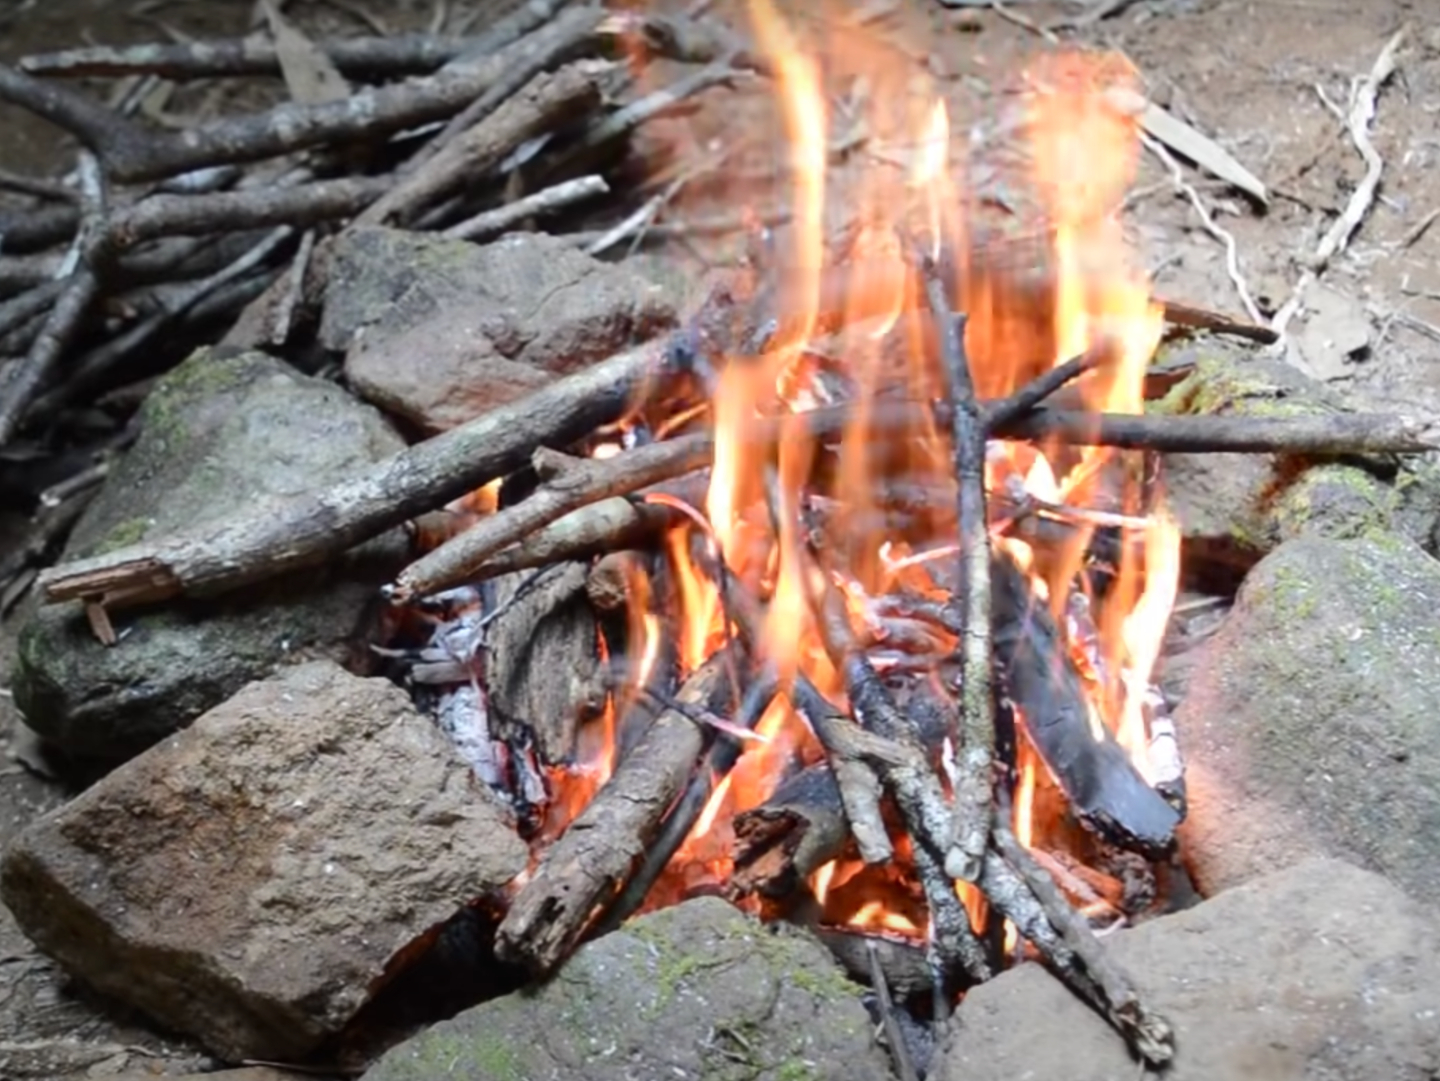
Source: Youtube / Primitive Technology
One will need a fire to complete the subsequent phases of building a wattle and daub shelter. Given this, one should only venture into the woods with a couple of lighters or some other equipment that can start a fire.
Practice Makes a Perfect Fire
It seems like he had little trouble getting the fire going, so here’s what we should do. First, stock up on dry wood and dry, fibrous kindling for this. Then, gently drop the ember into the kindling and blow on it lightly. After then, turn to God, hoping that the fire will start.
Source: Youtube / Primitive Technology
A fire might be the difference between life and death in a fight for survival. Not only does it serve practical purposes (providing shelter, warmth, and a way to filter water), but the sense of achievement we’ll feel after completing such a task when we’re out in the wilderness by ourselves is unparalleled.
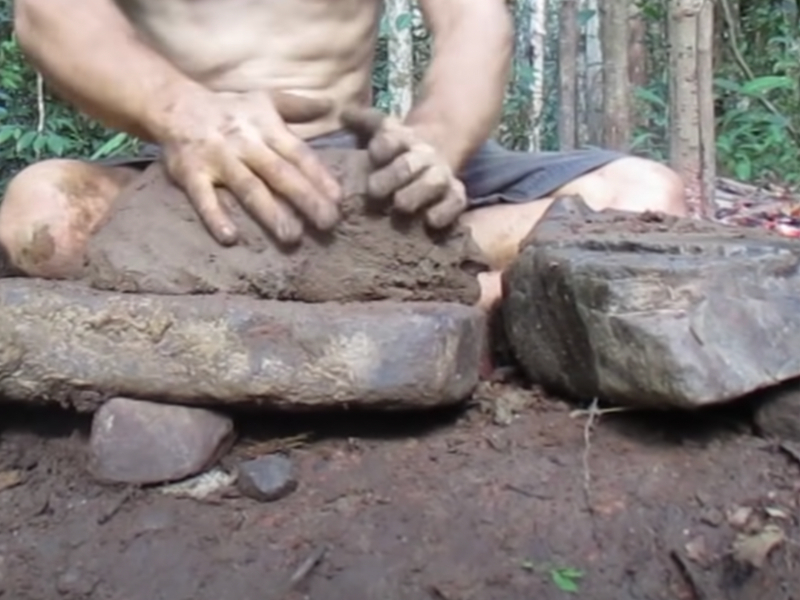
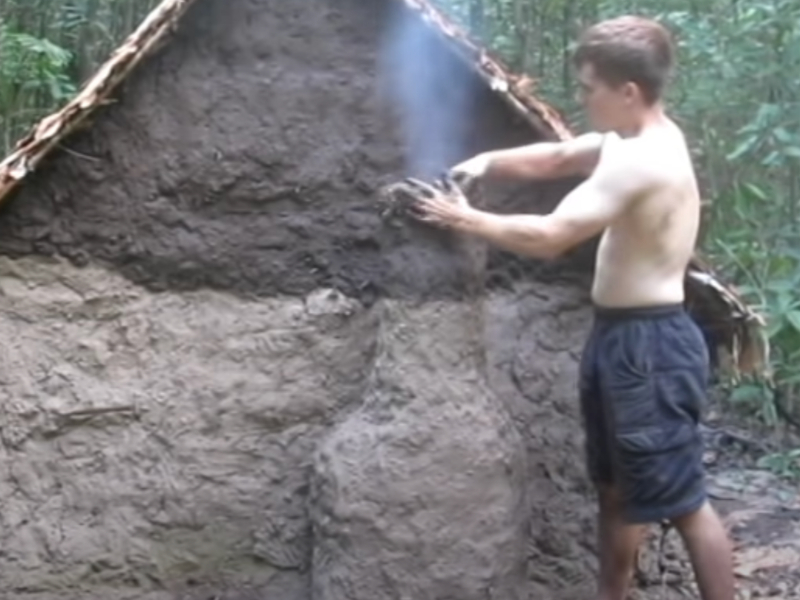
The Daub Plays a Part
The creation of the daub is the next phase in the process. Basically, it is a mixture of organic plant debris, water, and mud are the three components that make up a daub. It is, in essence, an early kind of concrete.
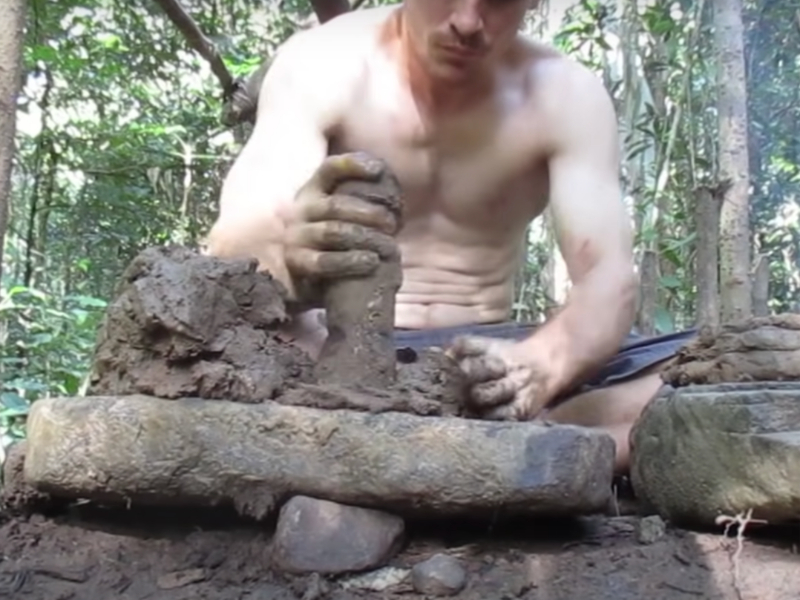
Source: Youtube / Primitive Technology
In order to make the daub, he first located a suitable location that had a substantial and reliable supply of earth; then, he combined this soil with water and various fiber materials. Finally, he returned it to the shack, where he smashed it all up and mixed it.
A Tiring but Rewarding Process
Although time-consuming, this process will provide the equipment and supplies we need to finish building our shelter and equip ourselves with a number of valuable conveniences. To use the daub, roll it into “snakes” and stack them.
Source: Youtube / Primitive Technology
For the following phase, we’ll need water, so keep going up another 7-10 inches to make a basin for storage. Again, it is possible to skip this step if we are in possession of a collapsible dog dish or shoes that are waterproof. Either way, just make sure you do it.
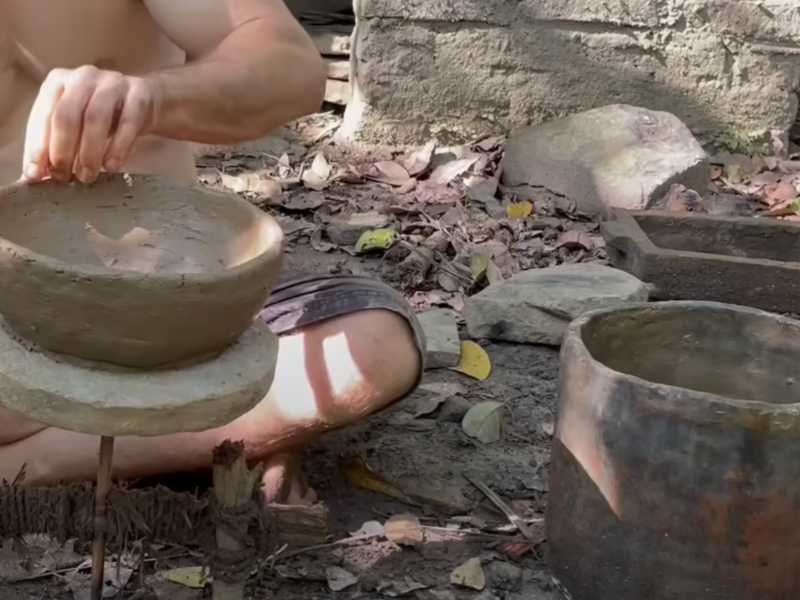
Creating the Containers
When making the containers, employ the “snake” approach since it will result in more consistent and robust containers. If one tries to mold a bowl using just one hand, the bowl will almost certainly disintegrate when one tries to dry it.
Source: Youtube / Primitive Technology
In no time at all, he fashioned seven bowls and spread them out to air-dry a little bit. Then, after the bowls had reached a point where they were barely firm to the touch, he buried them in a hole that was stuffed with dead leaves and twigs.
Not Just Any Clay Bowl
The new clay bowl will become more durable after being subjected to a low-heat burn all around its circumference. This will allow it to hold water without becoming unstable. Clay has a fibrous substance that functions similarly to rebar in that it contains the concrete together.
Source: Youtube / Primitive Technology
After the dish has cooled down to the appropriate temperature, carefully remove it from the fire. You are now in possession of handy water-transporting equipment, and it’s now ready to use! How cool is that?
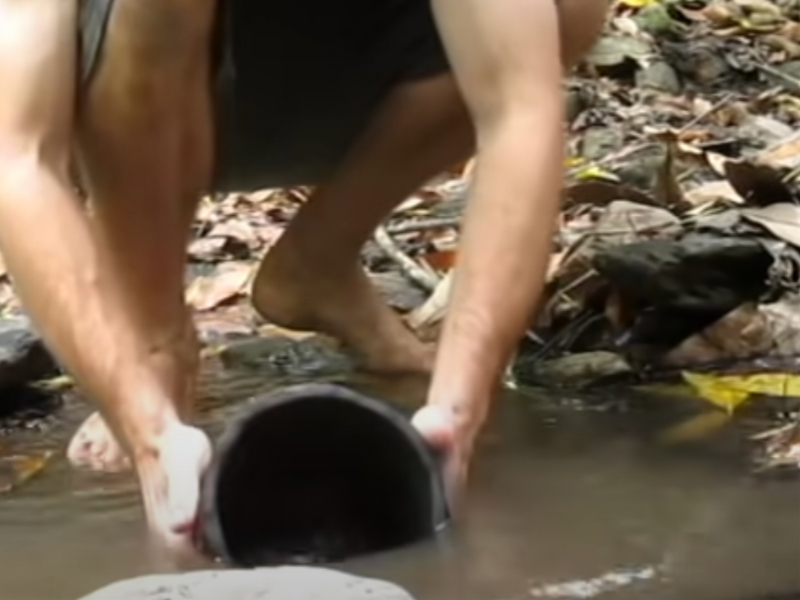
Carrying the Water Around
The next step is to bring water back to the hideout so that one may make much more daub. This daub will be utilized to insulate and preserve the walls of the lair. These walls will not be able to protect us throughout the night or keep heavy rain out, but they will do a decent job of shading us from the sun and keeping light rain off us.
Source: Youtube / Primitive Technology
We will need to make a significant amount of additional daub and then crush it into our woven wall of branches.
Next Stop: Building the Trench
The man then created a tiny drainage trench by using mud that was directly on the outside of the shelter to keep the base of the wattle and daub structure dry. When we have finished forming the daub by mixing together the earth, water, and plant components that are fibrous, pack it into the wall.
Source: Youtube / Primitive Technology
We must apply this on both the inner and external surfaces, as this will provide the most support and protection.
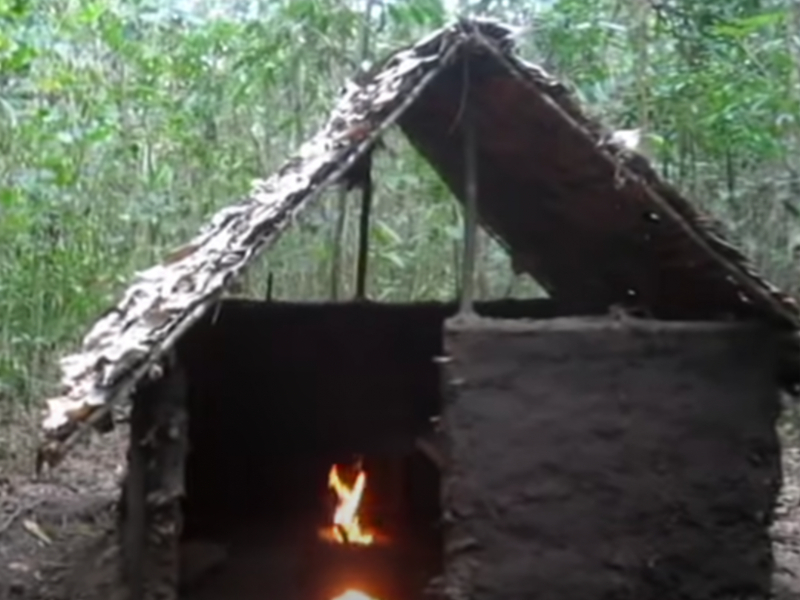
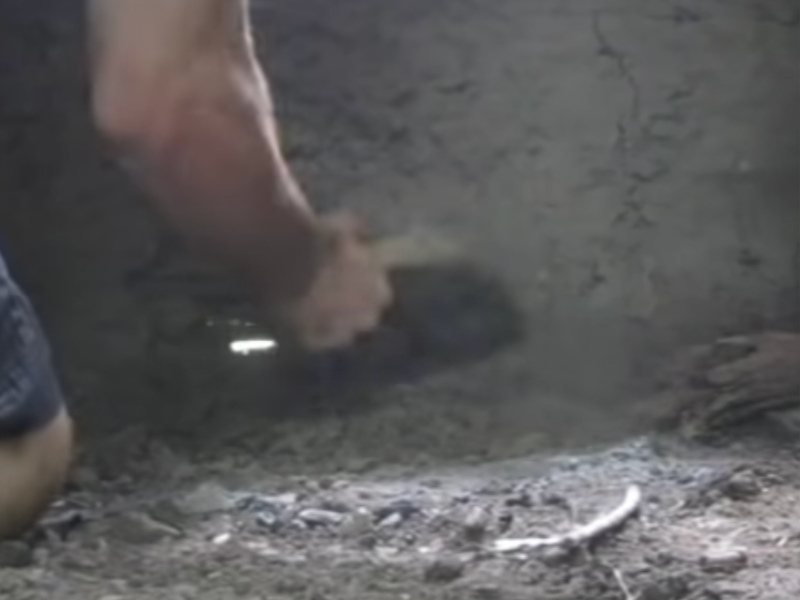
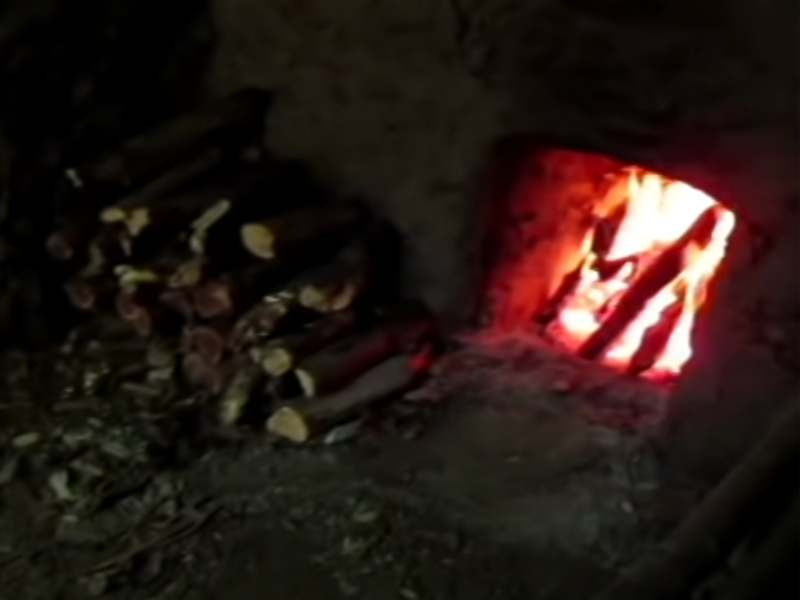
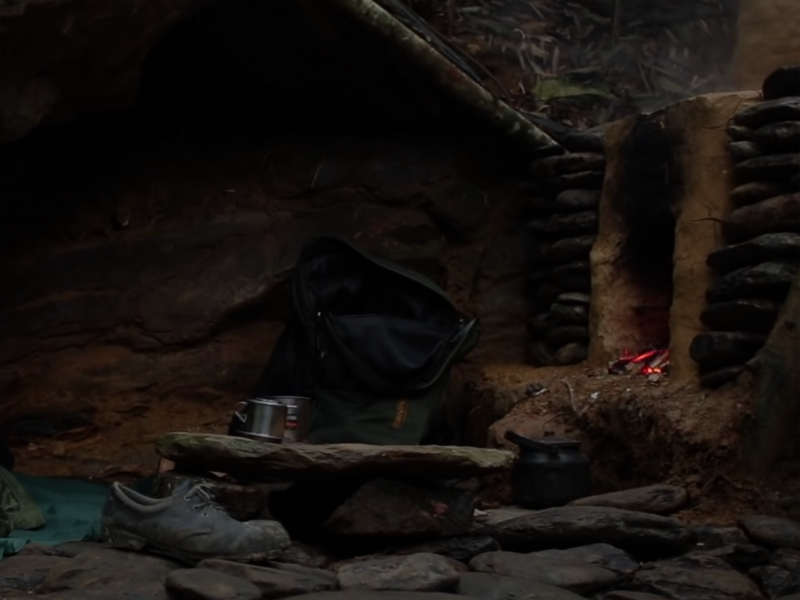
The Coals Help Out Too
Take a few of the coals you made previously and start a smoldering fire within the makeshift shelter. Your newly constructed walls will begin to dry out as a result of this. He went one step further and built a permanent fire pit right next to the bed, which was an impressive addition.
Source: Youtube / Primitive Technology
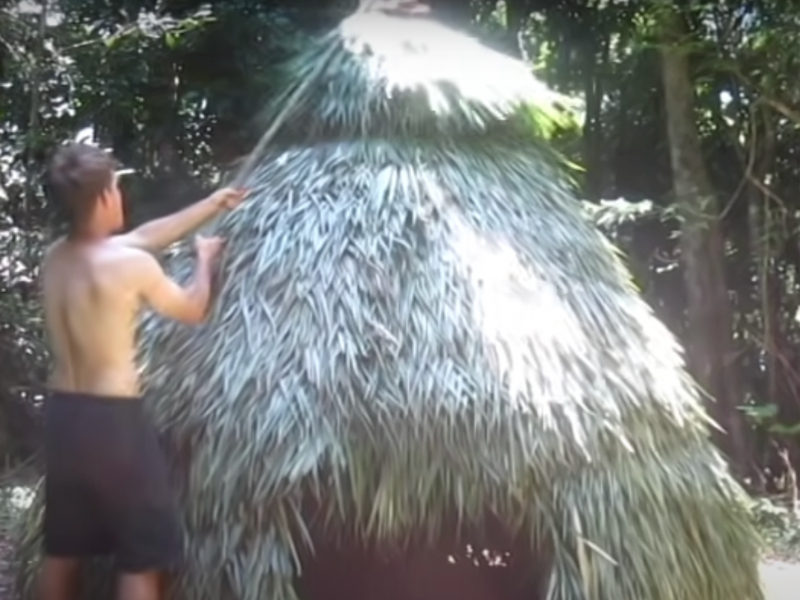
If you live in a location that receives a lot of rainfall, you’ll need to upgrade your roofing to something more durable. In here, he took his cutting stone and removed quite massive chunks of tree bark off the trees so that he could use them as shingles.
Trees Can Help Save the Day
By climbing the tree and removing the bark from areas that one would not ordinarily be able to access, he was able to utilize as much of a single tree as feasible. It is possible to destroy a tree by removing its bark; therefore, you should strive to do so as little as possible.
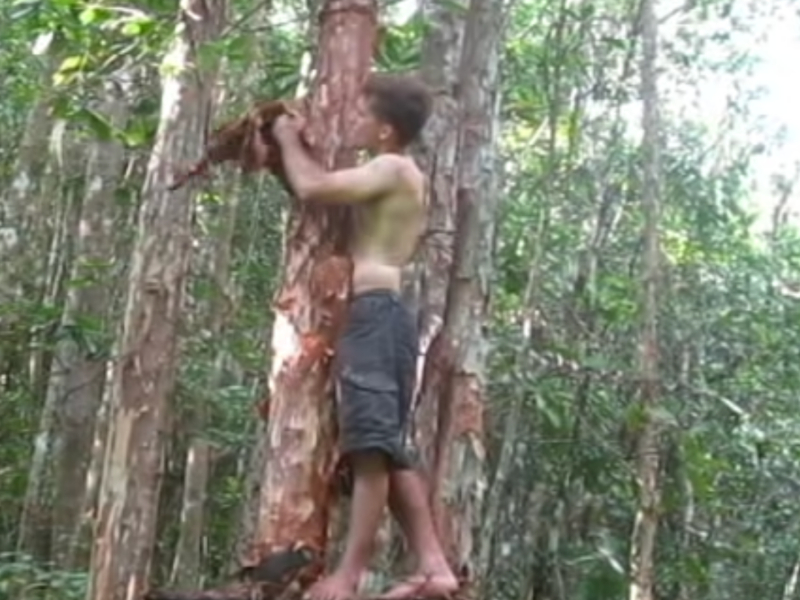
Source: Youtube / Primitive Technology
Install the huge bark panels on the roof in such a way that they are layered from the bottom up; this will ensure that water that runs down the roof during a rainstorm has nowhere to go other than off the roof.
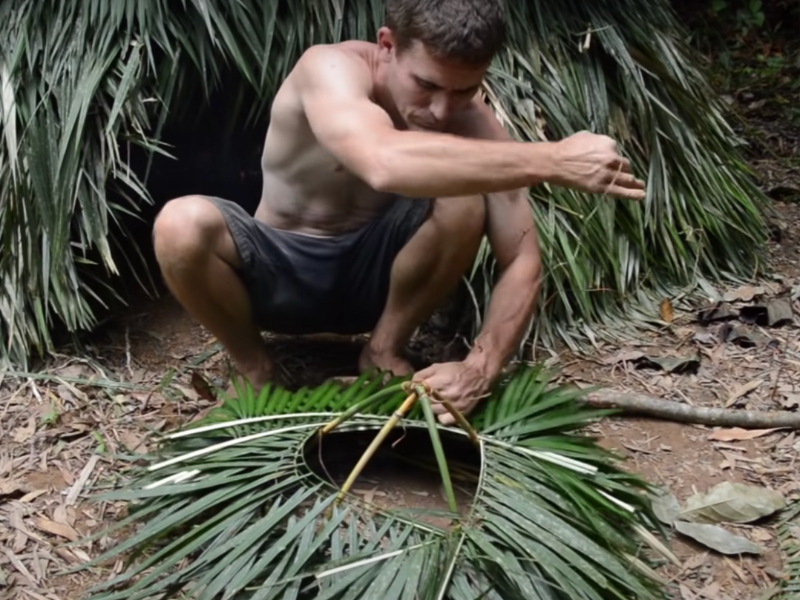
Almost at the End
After that, you are going to want to make a hole in the freshly dried wall that you have constructed. Perform this action on the side of your home that is opposite your front door. Again, take your time and remove only a little section of the wall at a time to avoid causing any damage to the structure you are currently working on.
Source: Youtube / Primitive Technology
If you break out more than you had planned, be sure to repair it with some more daub.
Adding a Makeshift Fireplace
The story doesn’t end here. Now, the man in the video started constructing a tiny fireplace that would be located on the exterior of the wattle and daub shelter by using the ground next to him as well as the water containers he had with him.
Source: Youtube / Primitive Technology
He lit a blazing ember in the bottom of the hole and then began piling his mucky materials higher and higher on top of it. It seems his task of building an outdoor home is almost complete!
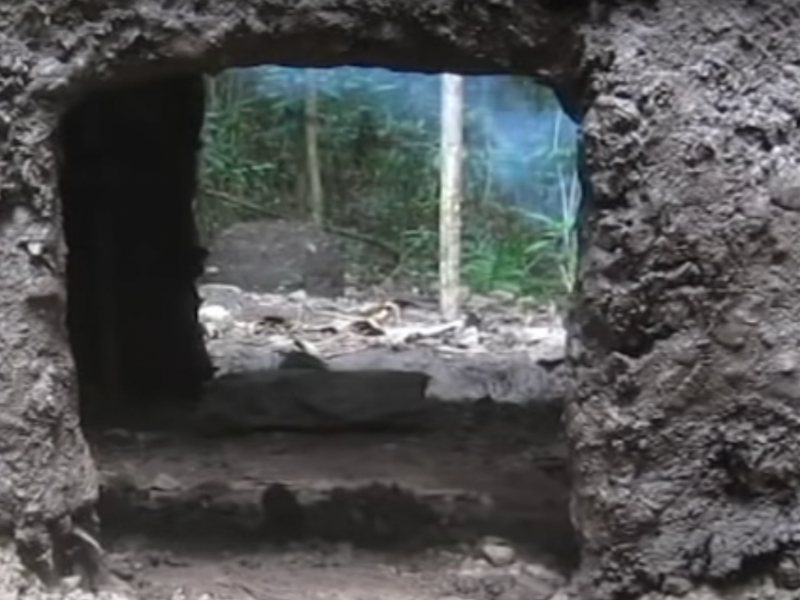
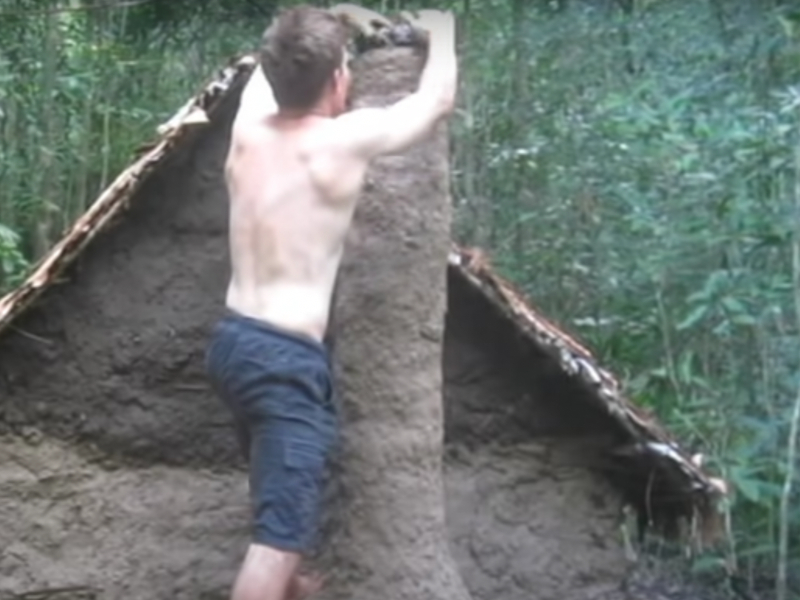
The Warmth of the Night
Now, this is a permanent solution to the nighttime smoke problem caused by the fire inside the building. There’s a chimney! Because he planned for the chimney to rise above the cover, he had to seal off the entire structure. It enables him to proceed with erecting the vent on the side of the hut.
Source: Youtube / Primitive Technology
This will serve to keep you dry and toasty during the day and night. It might even hold up during a cold winter’s night, so it’s imperative to have a chimney in this tiny abode.
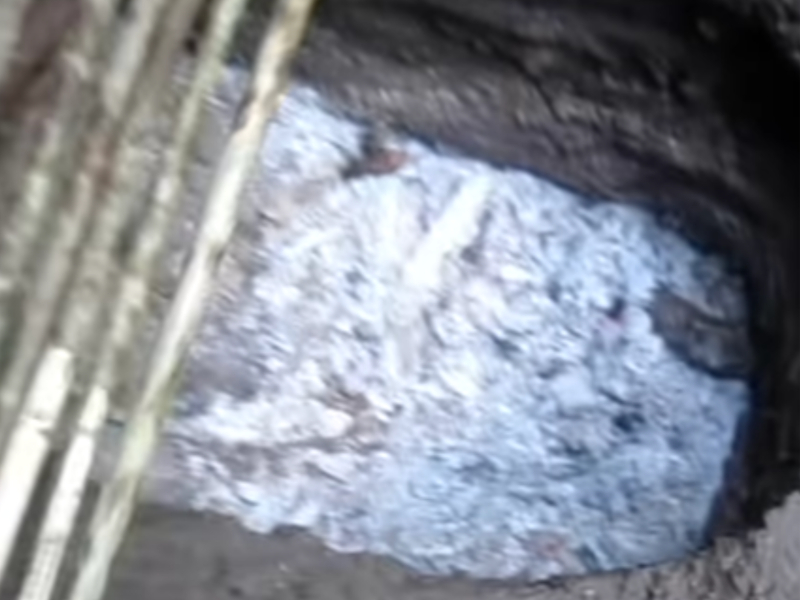
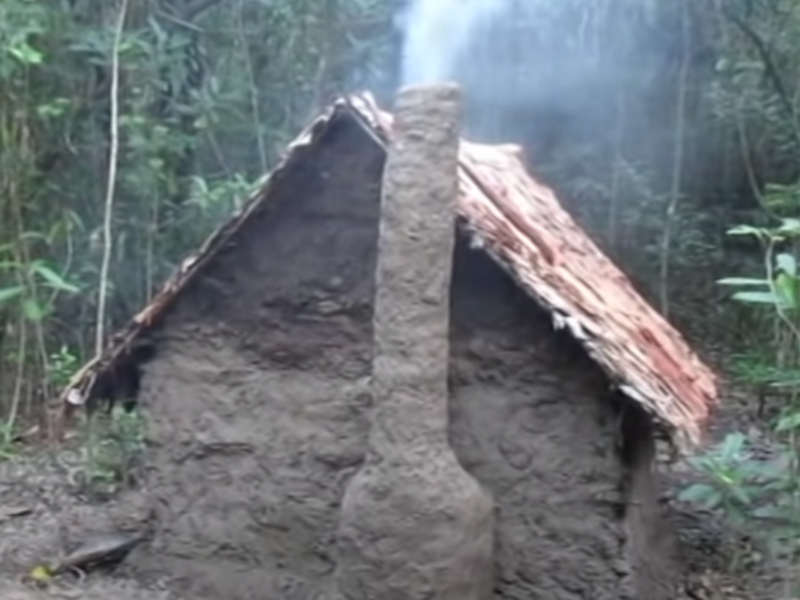
Securing the Final Touch
The last piece is placed on the top of the chimney, and while doing so, care is taken to ensure that it reaches above the level of the roof. This will put an end to any flames that may break out. The air that enters the building through the aperture on the interior is fed into the fire.
Source: Youtube / Primitive Technology
The smoke is allowed to leave the building via the chimney, but the warmth is retained within. This way, we don’t have to worry about freezing and getting sick at night.
Take the First Step
The way things are looking, if you had a constant supply of food and water, you could live here indefinitely. This is an incredible building, and it shouldn’t take more than a couple of days to erect. I’d rather sleep in one of these than shiver the night away under the shade of a tree.
Source: Youtube / Primitive Technology
For in-depth guidance on constructing a wattle and daub dwelling, one may refer to countless videos online to get started on that project as soon as possible.
Remembering What's First
The most crucial guideline of exploration and adventure is always to be ready for anything. Being well-informed is vital. One may pack as much gear as we like for a trip into the wilderness, but if we don’t know how to stay alive without it, we may leave everything at home.
Source: Youtube / Alexander Ayling
Tents leak and knives dull; never allow oneself to come to rely on any equipment; instead, use it to help you. When venturing into the unknown, it’s best to apply the saying, “Please Remember What’s First.”
Simple Terms are Easier to Remember
Those actions and their proper sequence may be easily remembered by recalling the initial letter of each of the aforementioned terms. In this case, “P” is for “protection,” Keep your safety a top priority at all times. Keep clear from “widow makers,” as we call ancient trees, and learn about local animals and other dangers.
Source: youtube / Reallybigmonkey1
The letter R stands for “rescue,” so keep that in mind. Use everything brightly colored you can find to build up a rescue mission. Put on as much as you can to signal for help. Use whatever is available to create a large and easily spotted “Help” sign.
Now Comes the Next Part
The letter W denotes the element water. Currently, water is the most pressing issue. It’s a good idea to look in both obvious and less obvious places, such as riverbanks and washes. Try to locate any spots that appear greener than the others to find a water source. “F” is for “fire” to start.
Source: Getty Images/ Sean Gallup
We indicated earlier that fire could help you feel better enough to escape your current predicament, and it’s true. It’s not always our physical condition or environment that causes us to give up, but rather our pessimistic outlook.
As Good as It Gets
The lack of hypothermia and the presence of predators are both avoided with the help of a safe place to rest. Even though this refuge is not ideal for more than one night’s stay, we’ll never know when help will arrive.
Source: Youtube / Primitive Technology Idea
Acquiring new information and practicing it often has given this man more faith in his survival abilities. So, let’s put ourselves out there and try new things; the benefits will be with us forever if we do. Just make sure to stick inside our comfort zone.